Table of Content
- Requirements
- Signing the software update
- Getting the software update ready for deployment
- Publish the software update to ConfigMgr
- Conclusion
Many organizations have the same problem; Microsoft System Center Configuration Manager (ConfigMgr) is in place but struggle to get their 3rd party applications or custom made applications updated, especially for those machines where users installed software themselves.
Since ConfigMgr Current branch version 1806 Microsoft made it possible to update these applications by using the same mechanism as other updates with the software update point and WSUS. The most requested feature is now included in the 1806 version.
There are multiple ways to get the most common 3rd party software like Java, Chrome, Firefox or Notepad++ updated. This can be done by using a paid catalog like PatchMyPC or software like Ivanti Shavlik or SolarWinds PatchManager. Custom applications and other applications that are not in these solutions will not be updated, and there is no control over which applications and the method that they use to publish the update.
This blog will describe the method that can be used to have full control of the deployment, including publishing software that is not published by such suppliers.
Requirements
Make sure the following requirements are met:
- At least ConfigMgr version 1806 is running
- There is an internal Certificate Authority with permissions to modify templates and make these available
- WSUS / SUP is installed and configured, WSUS must be configured to use SSL. For more information about implementing SSL for the SUP and WSUS: https://docs.microsoft.com/en-us/previous-versions/system-center/configuration-manager-2007/bb633246(v=technet.10)
In the ConfigMgr Console, enable the feature “Enable third party update support on clients” This can be found under Administration -> Updates and servicing -> Features. Also, when installing the 1806 update pack the ConfigMgr console will ask to activate this feature.
Signing the software update
All software that will be updated using this method must be signed. An Internal CA is needed to generate this certificate to manual sign the software if it isn’t.
Instead of having an internal CA it’s also possible to get one from a trusted external CA like Globalsign or Comodo. These will cost about $100 per year. In this blog post, an internal CA will be used.
Let’s configure some things and start adding an application that is not signed. In this example that will be 7-zip version 18.5.0.0.
All systems must be configured via group policy with the setting “Allow signed content from intranet Microsoft update service location”. This setting can be found under Computer Configuration -> Windows Components -> Windows Update
Within the CA, edit the Software Signing certificate template, make the private key exportable and publish the template. Request the software signing certificate (as a user), export this certificate including the private key as pfx file.
Import the same certificate into the computer store, under “Trusted publishers”. This is needed to publish software updates to WSUS. Download and install Software Center updates publisher. This software can be found here: https://www.microsoft.com/en-us/download/details.aspx?id=55543
Within the Windows ADK (Windows Imaging and Configuration Designer) there is an executable called “signtool.exe”. This tool can be used to sign executables and MSI’s with pfx files. An evaluated command prompt is required. To make it easy, start the “deployment and imaging tools environment” where the ADK directory is added to the path variable. The application must be signed before it can be deployed to WSUS / ConfigMgr.
The command line is simple: Signtool /sign /f “location of the PFX file” /p “password for the private key” “file to sign”
The application is now signed, this can be verified using “signtool /a” There is another possibility to check if an application is signed using the properties of the installation file.
More information about the signtool: https://docs.microsoft.com/en-us/dotnet/framework/tools/signtool-exe
If there is a need for changes to the MSI database like shortcuts or registry entry’s, modify the MSI with a tool like ORCA. 3rd party repackaging tools like Advanced Installer or Flexera AdminStudio can also be used to sign installers and make modifications to the MSI database.
Getting the software update ready for deployment
Copy the application installer into the software sources share.
Start the System Center Updates Publisher tool. Go to options and enable “enable publishing to an update server” and “Enable Configuration Manager Integration”.
For the update server, browse for the software signing certificate that has been exported before. After the certificate is selected, click the create button and enter the certificate password.
In the main window of SCUP, click on Create Update.
Browse for the MSI that contains the new version of the application, under download URL enter the full UNC path to the MSI that contains the update.
Fill in all details regarding the application update. These will be visible in the ConfigMgr Console and – if enabled – for the user in the software center.
In the next few screens the requirements like software that needed to be installed/updated before applying this update can be set, or the supersede for old versions in the same way as happens within the Windows Updates.
The parameters on which ConfigMgr will check if this update is required or installed must be set in the applicability screen. This can be rules like: program.exe must be version x.x, or a specific registry value must exist or have a specific value.
In this example, this check will look in the registry for the location where 7zFM.exe is installed, and if the version less than 18.5.0.0. In the next screen; “installed” ConfigMgr checks if 7zFM.exe is version 18.5.0.0.
Ensure there are built in enough parameters so only the machines that need an update will get this. Work with different parameters and with statements (“and”, “or” and “not”).
Click through the next few screens. The application is now ready to publish to the WSUS environment. When the update package is published this can be imported into ConfigMgr.
Publish the software update to ConfigMgr
 Select the 7-zip application, click on publish.
In the publishing screen, choose full content. Click through the next few screens; a security warning will pop up with the question if you want to accept the catalog. Accept this catalog and the application is published to WSUS. From this point on, the ConfigMgr console is needed to publish the update to endpoints.
Within the ConfigMgr Console go to Administration -> Site configuration -> Sites
Click on the site name. In the buttons at the top bar, click settings -> Configure site components -> Software update point.
 Click on the tab “Third party updates” and click apply.
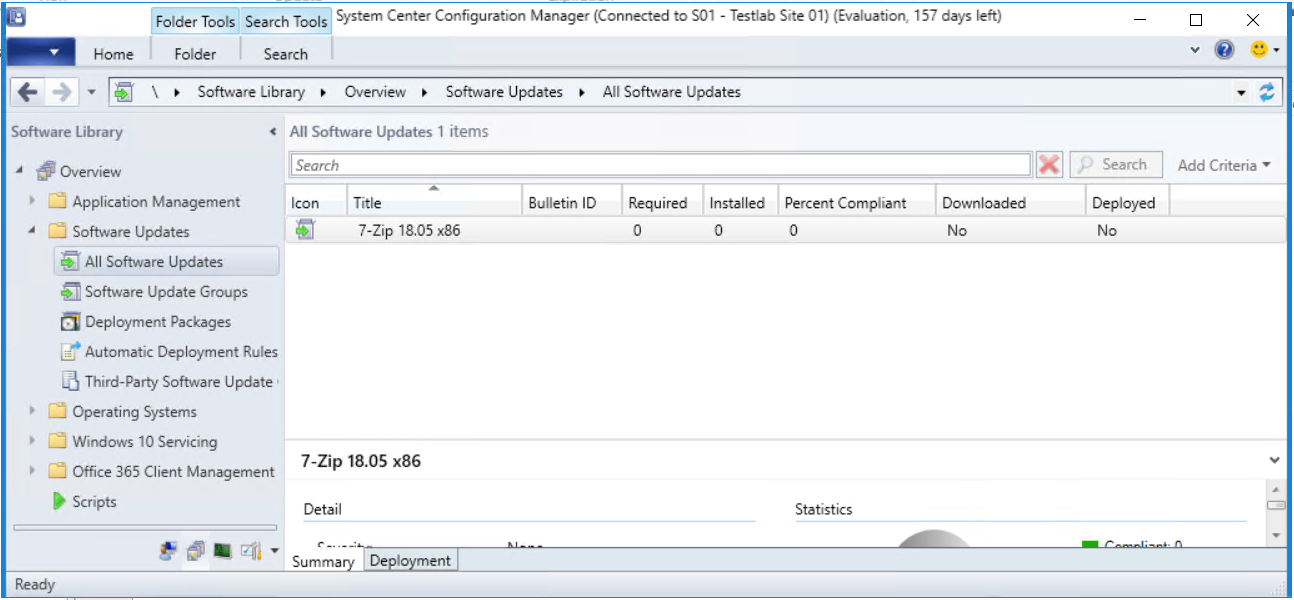
Go to “Software Library -> Software Updates -> All Software Updates”. Synchronize all software updates (click the button at the top of the screen). The SUP needs to be synchronized the first time to have the new applications available. The ConfigMgr SUP will now synchronize all data with the WSUS database, including the 7-Zip Application.
Return to the previous screen (to configure the software update point). Instead of going to the third party updates tab, go to the “products tab”.
The application is now in the ConfigMgr database and can be found under the products tab. Enable the product and synchronize ConfigMgr and WSUS for a second time.
After the synchronization is completed, this application update can be deployed in the same way as all other (Microsoft) updates.
Conclusion
Microsoft has done a good job by integrating System Center Updates Manager into ConfigMgr. The updating of applications is made easier, especially on those systems where users can install software themselves. This way the applications that are more common in the environment can be kept up to date. The initial process of getting System Center Updates Manager in place requires some effort, but when all set the whole process of adding a new update or new software to Updates Manager is easy.
Photo by Alexandru Acea on Unsplash


